How to
Hardware
First, connect the Raspberry Pi to the Melzi board using GPIO pins. Use RX and
TX pins from Raspberry Pi to TX and RX pins from Melzi board. In my case I used
the pins 14 and 15, TX and RX respectively. Check pinout.xyz or run the
command pinout in your Raspberry Pi terminal to check the pins. Don’t forget
to connect the ground pin from Raspberry Pi to the ground pin from Melzi board.
In my case I used the pin 9.
On the Melzi board side, I used the pins from the LCD connector. The following
image from RepRap wiki shows the pins from the LCD connector. 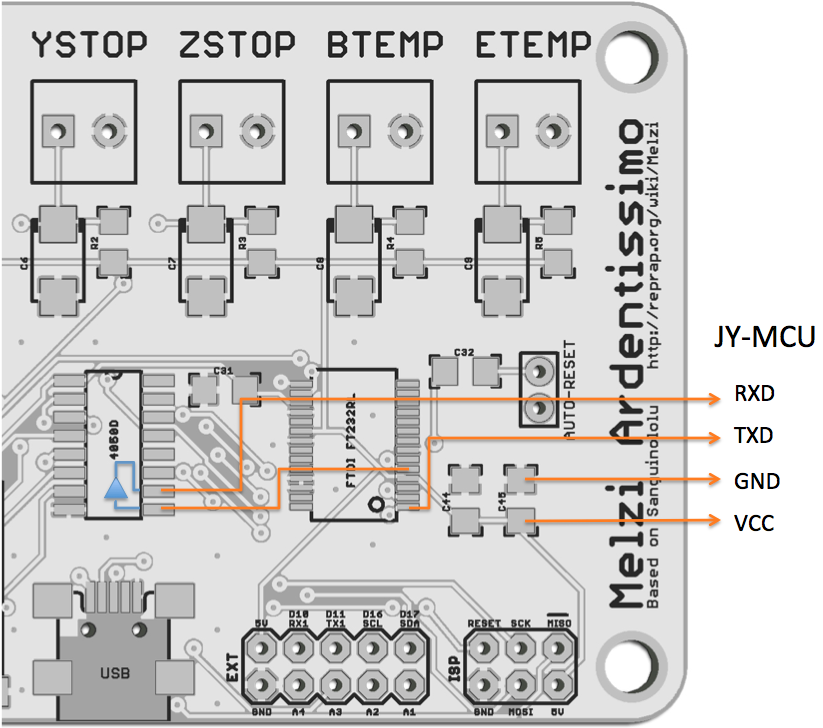 . If image source is off, looking from the side of the USB
connector towards you:
. If image source is off, looking from the side of the USB
connector towards you:
 ---------
 |       |  -------------      1 - 5V pin, you can connect it to the Raspberry 5V to power it
 |       |  | 1 2 3 4 5 |      2 - RX1 pin, connect it to Raspberry TX pin
 |  USB  |  | 6 7 8 9 0 |      3 - TX1 pin, connect it to Raspberry RX pin
 |       |  -------------      6 - GND pin, connect it to Raspberry ground pin. Along with the
 ---------                         5V pin, you can power the Raspberry Pi from the Melzi board.
Firmware
You may need to flash the bootloader to the Melzi board:
- Flashing a Bootloader to the CR-10
- Tronxy X1 Marlin 2.0
- Klipper documentation on bootloaders (
atmega1284pchip in this case) - Guide: How to Flash a Bootloader on Melzi Boards
- RepRap Wiki: Melzi - Bootloader Upload
Software
Considering that you already have Klipper installed and configured, you just
need to set the following lines to your printer.cfg file:
[mcu]
serial: /dev/ttyAMA0
In your terminal, run:
cd ~/klipper
make menuconfig
In the menu:
- Enable the “Enable extra low-level configuration options” option
- Set “Micro-Controller Architecture to “Atmega AVR”
- Set “Processor model” to “atmega1284p”
- Set “Processor speed” to “16 MHz”
- Set “Communication interface” to “UART1”
- Set “Communication baud rate” to “250000”
- Press “q” to save the configuration and exit
Then, run:
avrdude -p atmega1284p -c arduino -b 115200 -P /dev/ttyUSB0 -U out/klipper.elf.hex
If it reports some out of sync error, try changing the -b parameter to
-b 57600 or something else.
Finally, just reboot the Raspberry Pi (or the klipper service) and you should see the mcu connected.
Troubleshooting
If this does not work for you, try looking for the same tutorial for other boards, since some things may change depending on the OS, board version, web UI, etc.